The Lost World - Mercedes ML (W163) Montana project
-
DrewSmith007

- Site Moderator
- Posts: 725
- Joined: February 3rd, 2011, 10:44 pm
- Vehicle Make/Model: 1993 Ford Explorer
- Location: Wichita, KS
- Contact:
Re: The Lost World - Mercedes ML (W163) Montana project
Loving it so far, keep it up!
-
BoZ-ML
- Posts: 36
- Joined: March 7th, 2021, 1:38 am
- Vehicle Make/Model: Mercedes ML320
- Instagram: CarCrapGarage
- Contact:
Re: The Lost World - Mercedes ML (W163) Montana project
Update from the Netherlands! Very thrilled to give you this one!
This long Easter weekend we've continued working on the ML again.
Front bumper parts:
As said in the previous update we've been waiting for my brother-in-law to recover from his surgery. Now, about 5 weeks later he was literally jumping to get started again. Our new, custom dimple/flair tool also came in, so we couldn't wait to try it out!


The dimple die / flair die tool for under the hydraulic press.
Because we've already marked up all parts in cart board it was a piece of cake to cut out the steel bumper parts. We've cut out all the holes in the front bumper plates, which took forever. After that we've used the new, dimple tool to flair the edges. It looks great! Very happy with the result!

From cart board to steel.
Then it was time to tack the parts together and get a feel for the result, tweaking some details along the way.


Front bumper result. We still need to cut out the bigger hole to house the spot-lights next to the winch.
Side skirts:
On first Easter-day (we have two in the Netherlands) we went to my in-laws to celebrate and dine. And off course use my father-in-laws big-ass vintage drill-tower to cut out the holes for the side-skirts of the Jurassic Park ML. That drill did the 28 holes in about 30 minutes, where the day before we did about 3 in the same time-frame. Amazing!

Old-skool drill does the job!
This morning the edges of all those holes were flaired using the dimple die. We tack-welded everything together to fit it up.


Welding and fitting on the car.
We couldn't help ourselves today and knocked out one complete side skirt + the other front bumper half. The result:

This long Easter weekend we've continued working on the ML again.
Front bumper parts:
As said in the previous update we've been waiting for my brother-in-law to recover from his surgery. Now, about 5 weeks later he was literally jumping to get started again. Our new, custom dimple/flair tool also came in, so we couldn't wait to try it out!
The dimple die / flair die tool for under the hydraulic press.
Because we've already marked up all parts in cart board it was a piece of cake to cut out the steel bumper parts. We've cut out all the holes in the front bumper plates, which took forever. After that we've used the new, dimple tool to flair the edges. It looks great! Very happy with the result!
From cart board to steel.
Then it was time to tack the parts together and get a feel for the result, tweaking some details along the way.
Front bumper result. We still need to cut out the bigger hole to house the spot-lights next to the winch.
Side skirts:
On first Easter-day (we have two in the Netherlands) we went to my in-laws to celebrate and dine. And off course use my father-in-laws big-ass vintage drill-tower to cut out the holes for the side-skirts of the Jurassic Park ML. That drill did the 28 holes in about 30 minutes, where the day before we did about 3 in the same time-frame. Amazing!
Old-skool drill does the job!
This morning the edges of all those holes were flaired using the dimple die. We tack-welded everything together to fit it up.
Welding and fitting on the car.
We couldn't help ourselves today and knocked out one complete side skirt + the other front bumper half. The result:
Follow us on Instagram: @CarCrapGarage
-
Dwight
- Site Moderator
- Posts: 357
- Joined: October 8th, 2018, 12:59 pm
- Location: Jacksonville, FL
- Contact:
Re: The Lost World - Mercedes ML (W163) Montana project
Its looking absolutely amazing!
-
DrewSmith007
- Site Moderator
- Posts: 725
- Joined: February 3rd, 2011, 10:44 pm
- Vehicle Make/Model: 1993 Ford Explorer
- Location: Wichita, KS
- Contact:
Re: The Lost World - Mercedes ML (W163) Montana project
Great work!!! Please keep us updated!!!
-
nmlvaio101
- Posts: 48
- Joined: June 6th, 2016, 8:46 am
- Contact:
Re: The Lost World - Mercedes ML (W163) Montana project
Looks Amazing, I wish I had skills to do something like this.
-
dstone
- Posts: 57
- Joined: September 8th, 2019, 3:51 pm
- Vehicle Make/Model: 1995 Jeep Wrangler
- Location: Oklahoma City
- Facebook Name: Drew Stone
- Contact:
Re: The Lost World - Mercedes ML (W163) Montana project
Love seeing this take shape. You make it look easy.
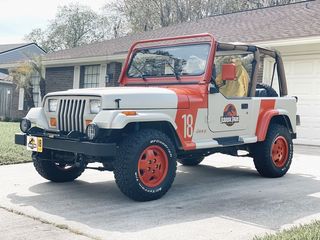
1995 Jeep Wrangler JP10 - WIP
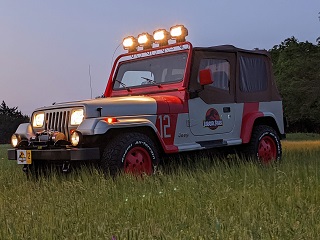
1995 Jeep Wrangler JP12
1991 Ford Explorer EX04 - WIP
1992 Ford Explorer EX05 - WIP
1995 Jeep Wrangler JP12
1991 Ford Explorer EX04 - WIP
1992 Ford Explorer EX05 - WIP
-
BoZ-ML
- Posts: 36
- Joined: March 7th, 2021, 1:38 am
- Vehicle Make/Model: Mercedes ML320
- Instagram: CarCrapGarage
- Contact:
Re: The Lost World - Mercedes ML (W163) Montana project
Another update from the Dutch Lost World Mercedes ML.
Front bumper update and lighting:
After the creation and fitment of the front steel bumpers we've cut the holes for the lights. We're not going to use the same lighting as the real movie car has, because I don't like the looks of the PIAA's (too small I guess) in the steel bumper. The newer LED spotlights you can get these days work way better and use way less energy. I also think using the same spot lights for the mirrors simply looks better.

Holes are cut.

Brackets are made and lights are installed for fitment.

Needless to say we just wanted to see how it looks when they are on

Because overhead switches are the coolest, we've installed 5 of them on the ceiling to control all the lights (2 front bumper spots, 2 mirror spots and 2 individual remote controlled search lights on the roof rack).
In the meantime the front bumpers are fully welded together (still 3 pieces to install, winch plate first, left and right bumper part second) and finished to a mirror shine. As soon as the bush guards are done these parts are ready to go for powder coating.
Side skirts and side bars:
Last time you've seen the holes were cut and dimpled/flaired for the side skirts. We than build the rest of the side skirt and also created the same one for the other side of the ML.

We've bought a few 'welding corners' (don't know the English word for them) and made a cart board template to adjust everything to our liking. Great setup, right?

In the meanwhile I found some diamond plate sheet metal used in a local clothing store to repurpose. Now we had everything to create the side steps.

The brother-in-law found a local shop that was kind enough to bend the diamond plate for us.
Then came the hardest part. Deciding on how to fit them to the car. It needs to be a multiple step process, because the side steps and side skirts have different colors AND we wanted to be able to take them off. The car had side bars when I bought it, so we used the crusty brackets as inspiration. We've decided to reuse/rebuild those, extend them, drill a few extra holes and give them some extra strength. It sounds and looks way easier than it is. Fitting a million times, cutting here, welding there, etc. It costs a lot of time.

Rear bracket with the welding corner and side skirt having their own piece of the bracket.

Front bracket the same way.

Welded everything up so that one side was done.
The fun part is that this needs to be done again for the other side of the ML. Probably we'll do this a lot quicker now we know what to look for. We hope to have the other side ready next weekend.

The result. No problem using them as a normal side step.
Front bumper update and lighting:
After the creation and fitment of the front steel bumpers we've cut the holes for the lights. We're not going to use the same lighting as the real movie car has, because I don't like the looks of the PIAA's (too small I guess) in the steel bumper. The newer LED spotlights you can get these days work way better and use way less energy. I also think using the same spot lights for the mirrors simply looks better.
Holes are cut.
Brackets are made and lights are installed for fitment.
Needless to say we just wanted to see how it looks when they are on
Because overhead switches are the coolest, we've installed 5 of them on the ceiling to control all the lights (2 front bumper spots, 2 mirror spots and 2 individual remote controlled search lights on the roof rack).
In the meantime the front bumpers are fully welded together (still 3 pieces to install, winch plate first, left and right bumper part second) and finished to a mirror shine. As soon as the bush guards are done these parts are ready to go for powder coating.
Side skirts and side bars:
Last time you've seen the holes were cut and dimpled/flaired for the side skirts. We than build the rest of the side skirt and also created the same one for the other side of the ML.
We've bought a few 'welding corners' (don't know the English word for them) and made a cart board template to adjust everything to our liking. Great setup, right?
In the meanwhile I found some diamond plate sheet metal used in a local clothing store to repurpose. Now we had everything to create the side steps.
The brother-in-law found a local shop that was kind enough to bend the diamond plate for us.
Then came the hardest part. Deciding on how to fit them to the car. It needs to be a multiple step process, because the side steps and side skirts have different colors AND we wanted to be able to take them off. The car had side bars when I bought it, so we used the crusty brackets as inspiration. We've decided to reuse/rebuild those, extend them, drill a few extra holes and give them some extra strength. It sounds and looks way easier than it is. Fitting a million times, cutting here, welding there, etc. It costs a lot of time.
Rear bracket with the welding corner and side skirt having their own piece of the bracket.
Front bracket the same way.
Welded everything up so that one side was done.
The fun part is that this needs to be done again for the other side of the ML. Probably we'll do this a lot quicker now we know what to look for. We hope to have the other side ready next weekend.
The result.
Follow us on Instagram: @CarCrapGarage
Re: The Lost World - Mercedes ML (W163) Montana project
Great job dude 
-
nmlvaio101
- Posts: 48
- Joined: June 6th, 2016, 8:46 am
- Contact:
Re: The Lost World - Mercedes ML (W163) Montana project
Looks amazing. I wish I can get you to build me one.
Who is online
Users browsing this forum: No registered users and 23 guests